
Ita Bag Blog
How to Put Plushies in an Ita Bag
How to Put Plushies in an Ita Bag Without Making the Display Messy
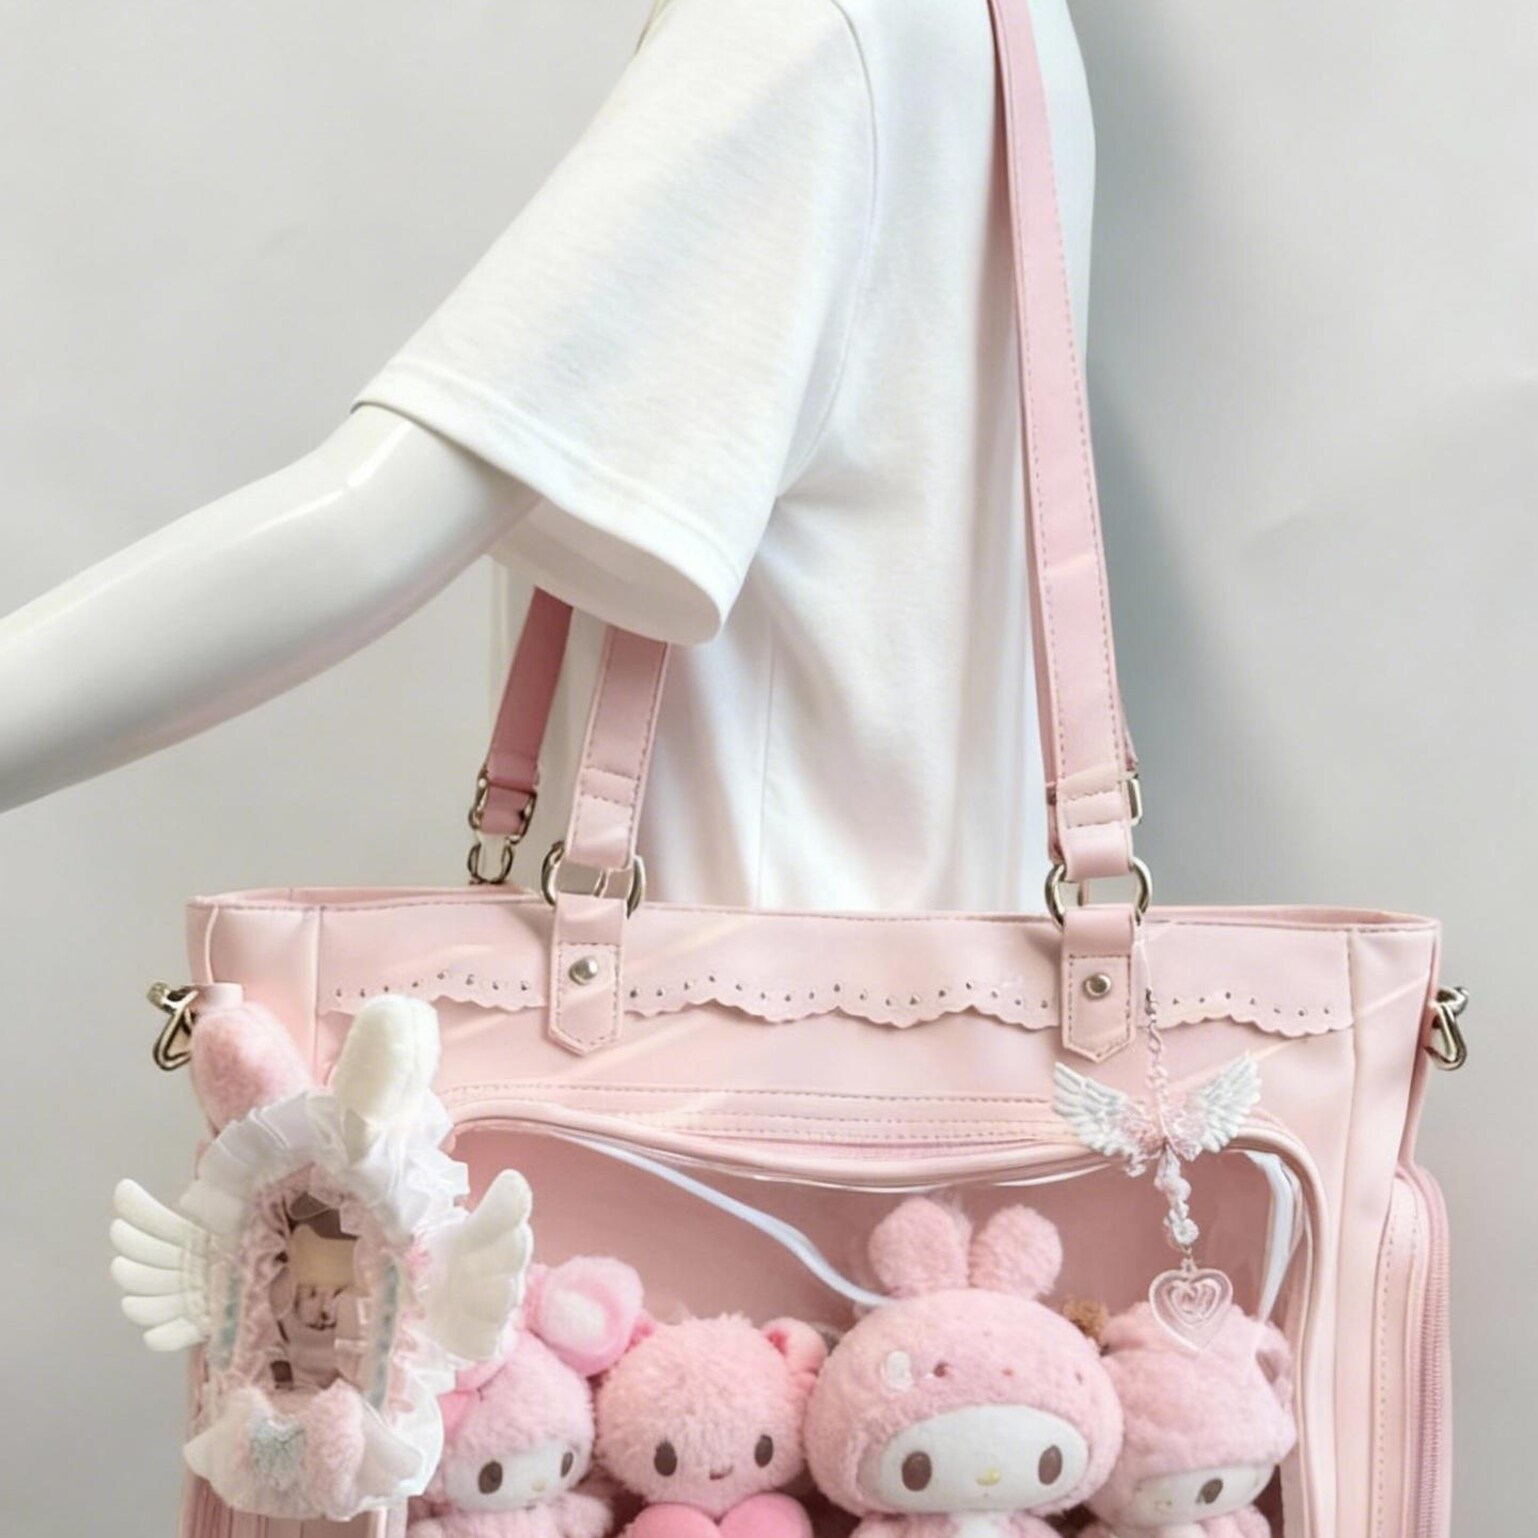
Plushie ita bag setups look great when the plush is clearly framed and supported. They look bad when the plush is crushed against the window, slumping to one side, or surrounded by random accessories with no structure.
The trick is to treat the plush as the focal point and build the rest of the layout around it.
Plushie ita bag setups look great when the plush is clearly framed and supported. They look bad when the plush is crushed against the window, slumping to one side, or surrounded by random accessories with no structure. The trick is to treat the plush as the focal point and build the rest of the layout around it.
Step 1: Choose a Bag With Enough Depth
Fitting a plushie into an ita bag window requires matching the plushie’s dimensions to the bag’s window opening — and understanding that the plushie will take up most or all of the visible space, so your pin display needs to work around it. Here is how to get a clean, secure plushie display.
Step 1 — Measure Before You Buy
The most common mistake: buying a plushie and then discovering the window is too small. Measure the interior of the window pocket (not the visible window — the interior opening) before purchasing. Standard plushie sizes and the minimum window they need:
- Tsum Tsum / chibi plushies (8–10cm): Need a window at least 12×12cm. Fit easily in most crossbody ita bags.
- Standard character plushies (15–20cm): Need a window at least 22×20cm. Fit in standard crossbodies and small backpacks.
- Large plushies (25–30cm): Need a window at least 30×28cm. Require a large crossbody or ita backpack. Check the size guide for specific window dimensions.
- Very large plushies (35cm+): Most ita bags will not fit these. Use an open-top tote with pins on a separate insert panel instead.
Step 2 — Prepare the Insert
When displaying a plushie alongside pins, the insert serves a different role than a pin-only display. Rather than covering the whole window, the insert acts as a backdrop and pin rail around the plushie. Two approaches:
Surround layout: Cut the insert to fit the full window. Position the plushie in front of the insert, centred or slightly off-centre. Pins go on the insert around the plushie. This keeps the plushie from slumping and fills the visual space with pins.
Side panel layout: If the plushie is large, use a half-width insert on one side and leave the other side for the plushie. Works well for bags with a wide window where a single plushie would look isolated in the centre.
Step 3 — Securing the Plushie
Plushies do not pin to the insert — they need other anchoring methods:
- Safety pin through the back seam: Thread a small safety pin through the plushie’s rear seam or tag and pin it to the insert. Invisible from the front and holds securely.
- Velcro dot: Stick a small velcro dot to the back of the plushie and its matching side on the insert. Easy to reposition. Less secure for heavy plushies.
- Gravity and fit: For snug window pockets, the window itself holds the plushie in place by friction. Works for tightly fitted plushies in deep window pockets.
Mistakes to Avoid
- Forcing an oversized plushie: Overstretching the PVC window distorts the bag shape permanently. If the plushie fits only with difficulty, it is too large — try a smaller variant or a different bag.
- Mixing very different plushie and pin scales: A large plushie next to tiny 18mm pins looks unbalanced. Match pin size to the remaining window space — larger pins (40mm+) for large plushie bags.
- Leaving the insert out: Without an insert, pins behind the plushie have nothing to grip and the whole display shifts when the bag moves. Always use an insert even if most of the window is occupied by the plushie.
- Not accounting for bag weight: Plushies are lighter than they look, but adding a 300g plushie to an already heavy bag can affect strap comfort. For large plushie ita bags, prioritise bags with padded straps. See the plushie ita bag guide for strap and window recommendations.
FAQ
- Can a Squishmallow fit in an ita bag?
- Standard Squishmallows (20–30cm) are too large for most ita bag windows. Mini Squishmallows (7–8cm) fit in most standard crossbody ita bags. Check window dimensions before purchasing.
- Does the plushie need to face the window?
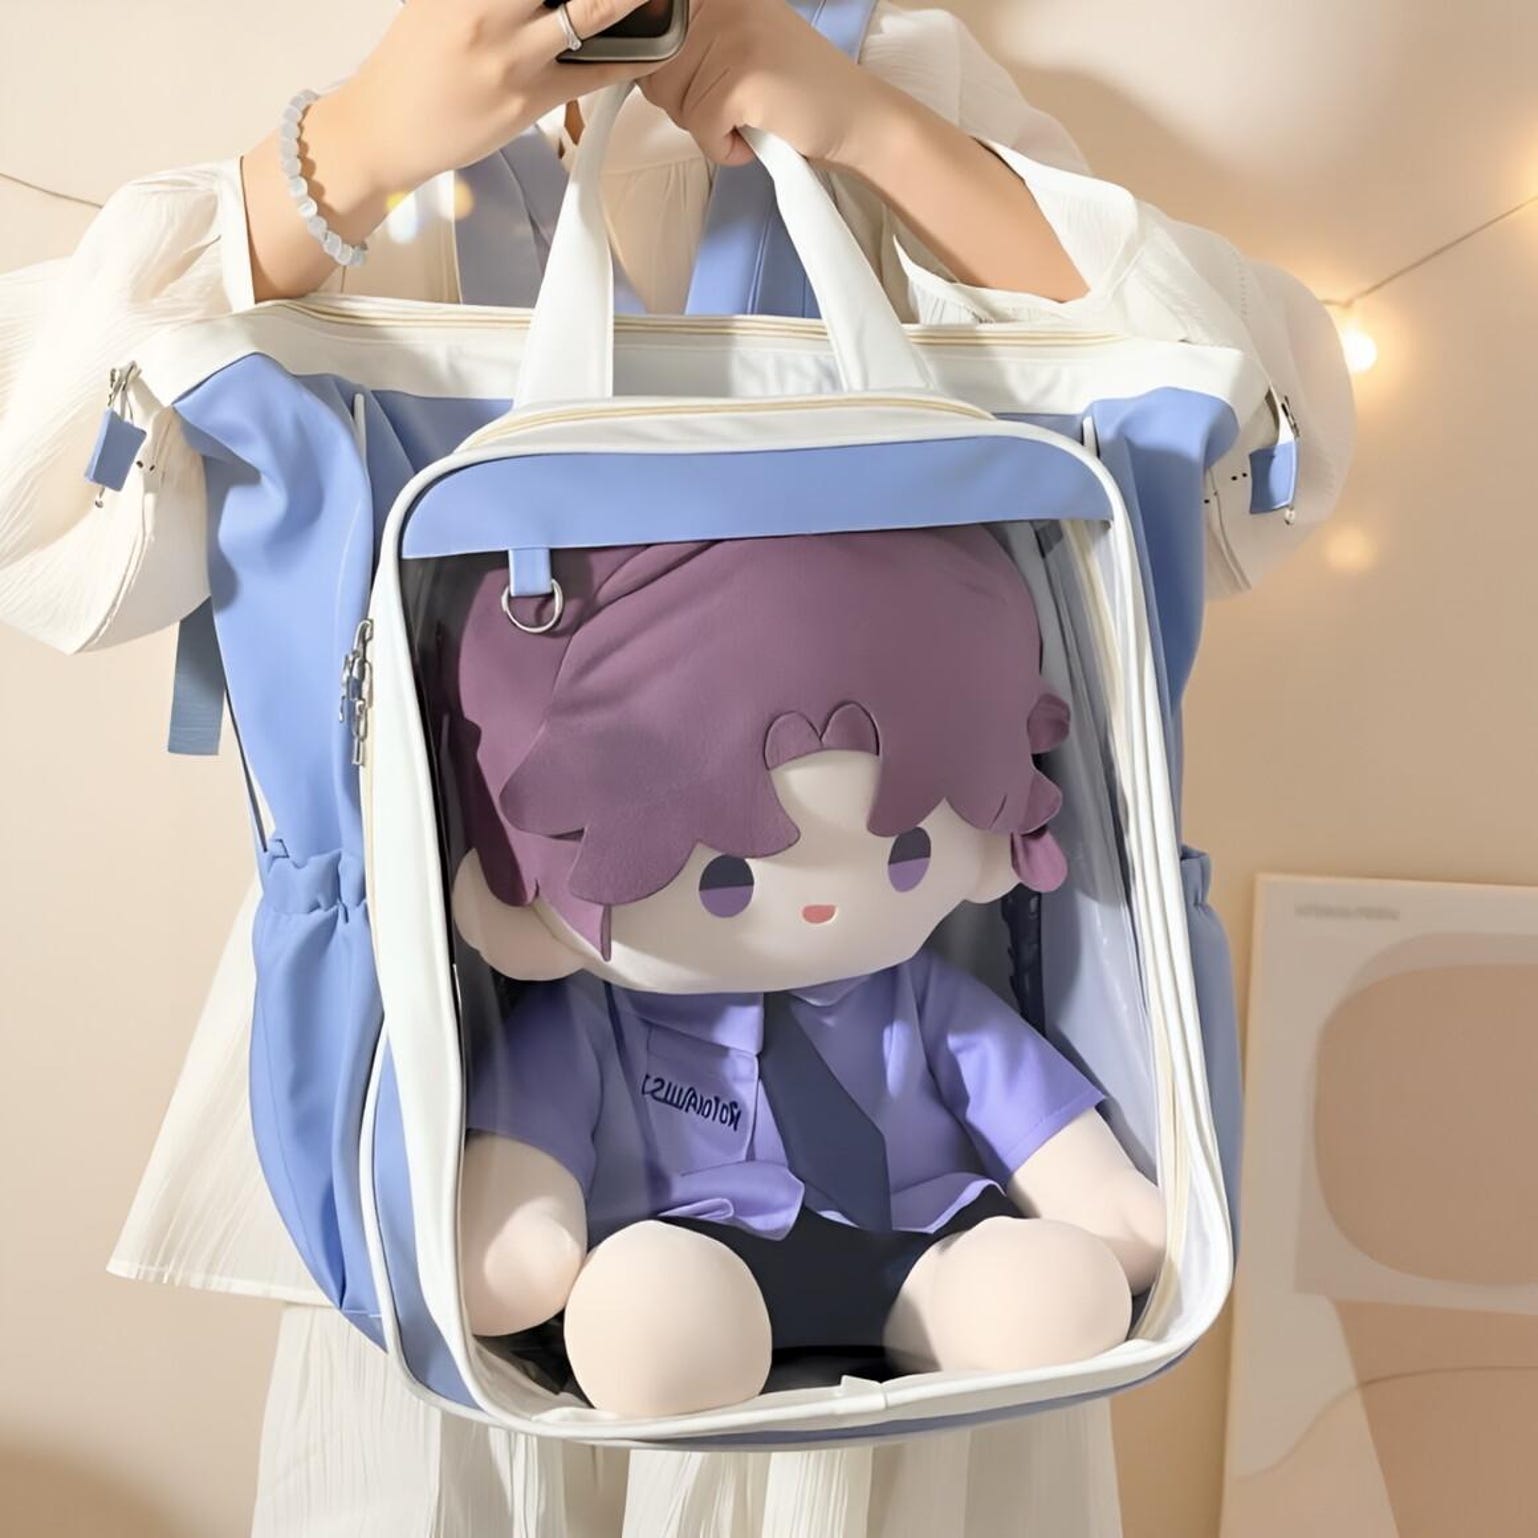
- Yes — face-forward placement is standard. A plushie facing sideways or backwards does not read as a display. For plushies with a flat back (like a chibi stand figure), the flat side faces the insert and the character’s face faces out through the window.
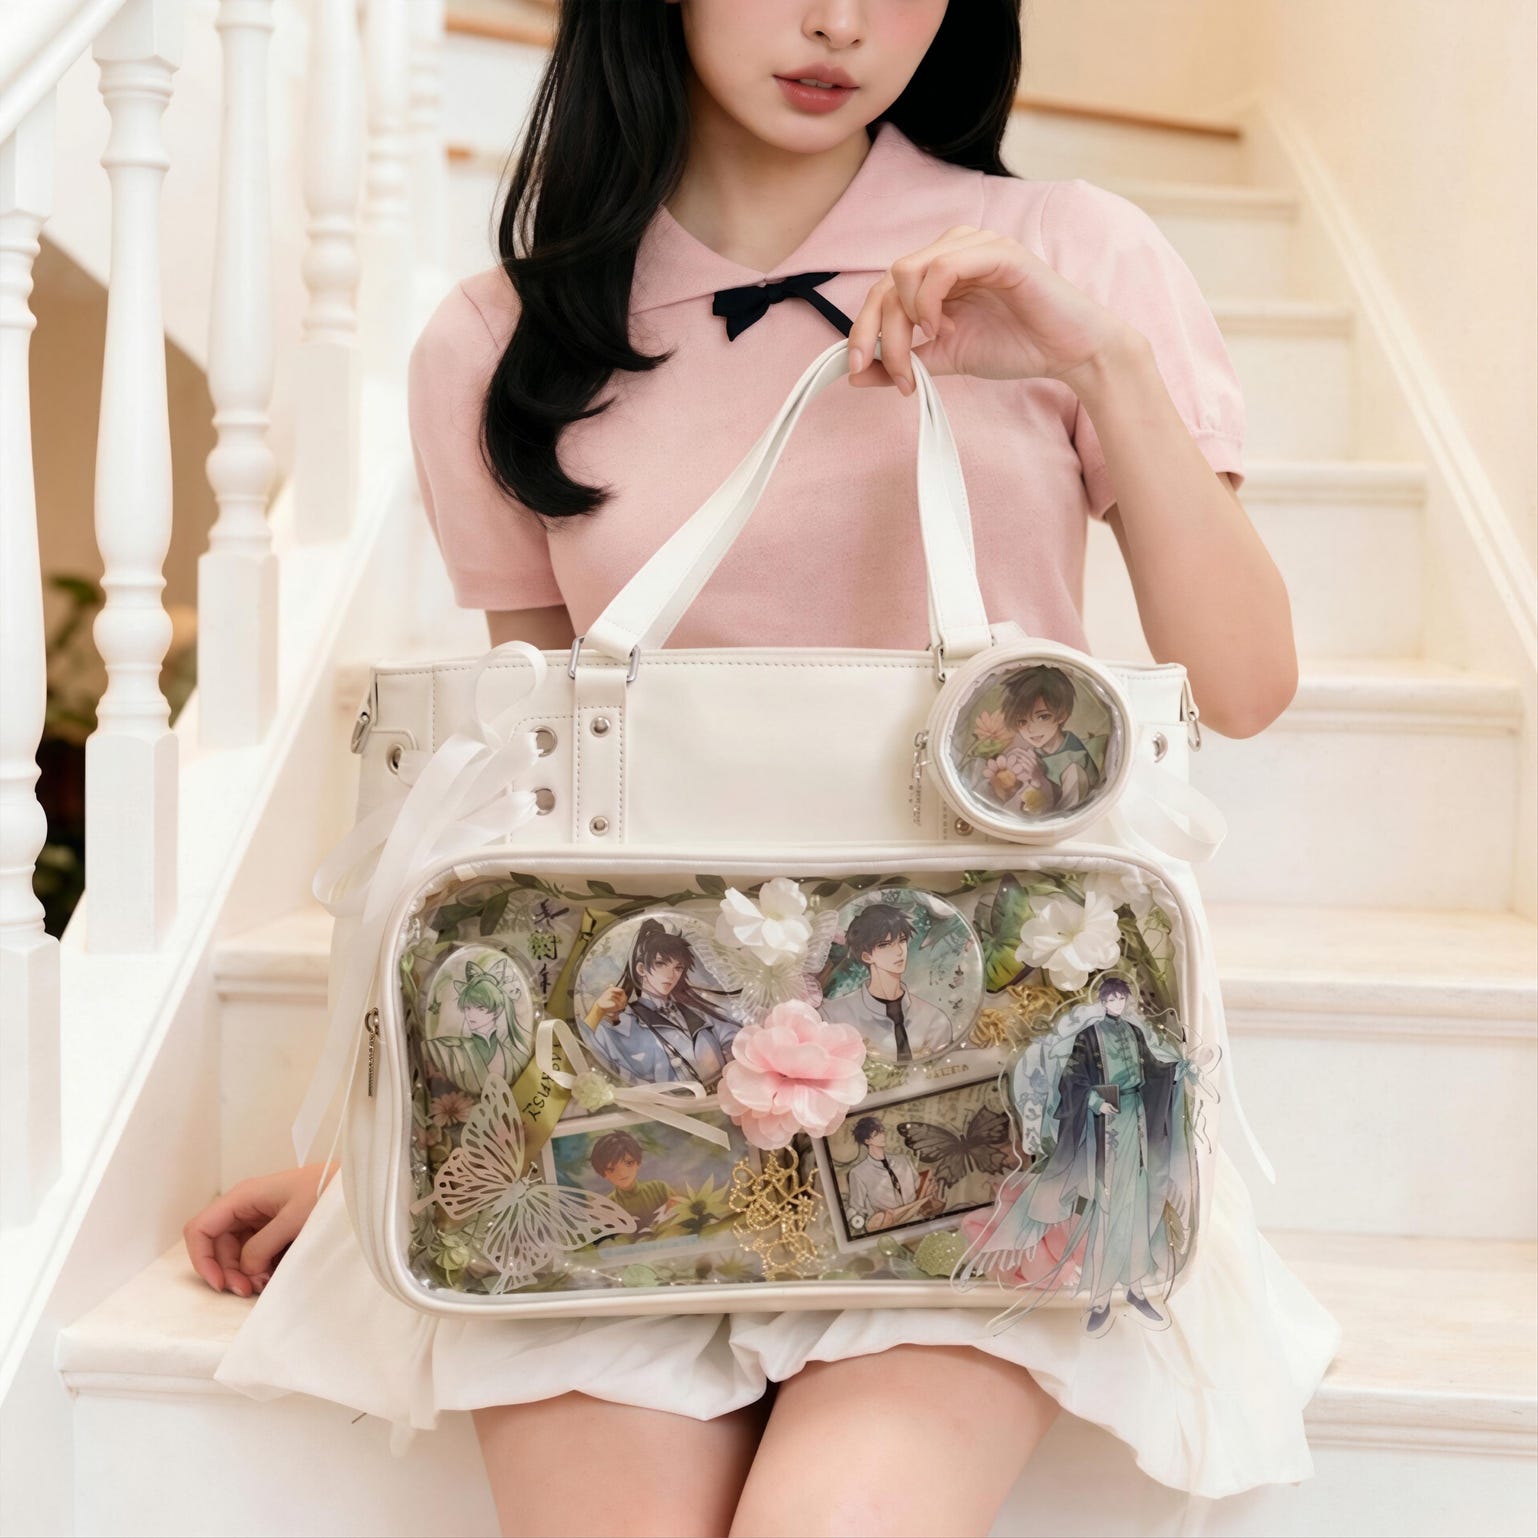
- Can I mix a plushie with photocards?
- Yes. Place the plushie centrally, and arrange photocards in rigid sleeves around it in the remaining window space. This works particularly well for K-pop idol bags where character plushies and official photocards both exist for the same artist.
Shop Ita Bags
Browse ita bags with large windows built for plushie displays at YourItBag. The plushie sizing guide lists exact window dimensions and which plushie sizes fit.
Step 2: Pick One Main Plush First
Do not start by stuffing multiple plushies into the window. Begin with: Once that works, you can decide whether the setup needs small supporting items.
- one main plush
- one clear focal position
- enough negative space to frame it
Step 3: Stabilize the Plush
The plush should not roll or slide every time the bag moves. Depending on the bag and plush, that can mean: The point is stability, not overstuffing.
- using hidden support behind the plush
- anchoring accessories around it
- keeping the insert firm enough to frame the setup cleanly
Step 4: Add Supporting Merch Carefully
Once the plush is placed, add only the merch that supports it visually. Good supporting items: Too many extras make the plush disappear instead of stand out.
- a few matching pins
- one or two charms
- photocards if they fit the theme
- a color-matched background
Step 5: Watch the Front Window Pressure
If the plush presses hard into the clear panel, the setup is too tight. That creates: The plush should feel secure, not compressed.
- visual distortion
- more rubbing on the window
- greater chance of shifting
Best Layout Types for Plush Builds
One plush in the middle, small accents around it. This is the cleanest and most reliable setup.
One plush surrounded by a simple ring of matching badges or pins.
Works best when the bag is large enough and the card placement does not crowd the plush.
Common Plush Setup Mistakes
Most plush builds look better when they are edited down.
- choosing a bag that is too shallow
- adding too many plushies
- overfilling the window with extra merch
- ignoring balance
- letting the plush rub hard against the front panel
Best Bags for Plushie Displays
Plush setups work best in: If you are still choosing bag size, use How to Choose Ita Bag Size for Your Merch.
- medium to large bags
- bags with visible display depth
- bags with enough width to frame the plush cleanly
Frequently Asked Questions
Yes, but most setups look better with one main plush unless the bag is large.
Depth. Without enough depth, the plush will look cramped.
Yes, but keep the pins supportive rather than overwhelming.
Usually because the bag is too shallow or the window is overfilled.
Light contact can happen, but it should not be pressed hard into it.
Live Bags That Work for Plush Displays
Pulled from the live April 15 catalog export used for this content audit.
Large Ita Backpack with Clear Window for Plushies and Pins
Large Black Kawaii Ribbon Ita Crossbody Bag with Clear Window for Plushies and Pins
Large Kawaii Ita Backpack with Clear Window for Plushies and Pins

Large Pink Kawaii Y2K Ita Backpack with Clear Window for Plushies and Pins
Build the next click naturally
Every audited page now ends with a live merch path and a guide path so the content can support both ranking intent and shopping intent.