Pillar Guide

The Complete Ita Bag Guide

Everything you need to understand, choose, and set up an ita bag — from what the category actually is to how inserts, sizing, and merch type should drive your first purchase.

This guide covers the full picture: what an ita bag is, the history behind it, how to choose the right format, and what to look for before you buy.

What an ita bag really is

A normal bag hides what you carry. An ita bag stages what you carry. That shift from storage-first to display-first is what makes the category different from every other bag type.

The defining feature is a clear window panel — usually made from thick PVC or acetate — that sits on the front of the bag. Behind that window sits an insert: a padded or structured backing board that holds pins, stands, charms, and other merch in place while you carry the bag. The window protects the display; the insert organizes it.

What you see from the outside when someone carries an ita bag is the deliberate result of time spent arranging: enamel pins in clusters, acrylic stands framed in the center, rosettes and charms filling the corners. It is a portable shrine to a fandom, character, or aesthetic — the bag itself becoming part of the expression.

The word “ita” (痛い, itai) comes from Japanese and means painful or ouch. The original community used it self-referentially: fans describing their own intense, over-the-top merch displays as “painful” to look at because of how much love (and money) went into them. The name stuck. Today it is worn as a badge of pride, not an apology.

The right ita bag depends less on trend words and more on what merch you actually want to show. Pin-heavy layouts, plushie-focused bags, and photocard displays each ask for different shapes, different insert depths, and different window sizes. Starting from the merch — not the aesthetic — is how you avoid ending up with a bag that fights your collection instead of framing it.

A Brief History of Ita Bag Culture

Ita bags grew out of the same otaku fan culture in Japan that produced itasha (decorated fan cars) in the early 2000s. Both the car and bag versions share the same principle: cover a functional object in so much character merch that it becomes a visible declaration of fandom devotion.

The bag format became popular at events like Comiket, Japan’s massive twice-yearly doujinshi market, where fans began using tote bags with clear panels to display their favorite character merch while keeping hands free. Early ita bags were often DIY — fans sewed clear pockets onto existing bags or modified regular totes with acetate panels.

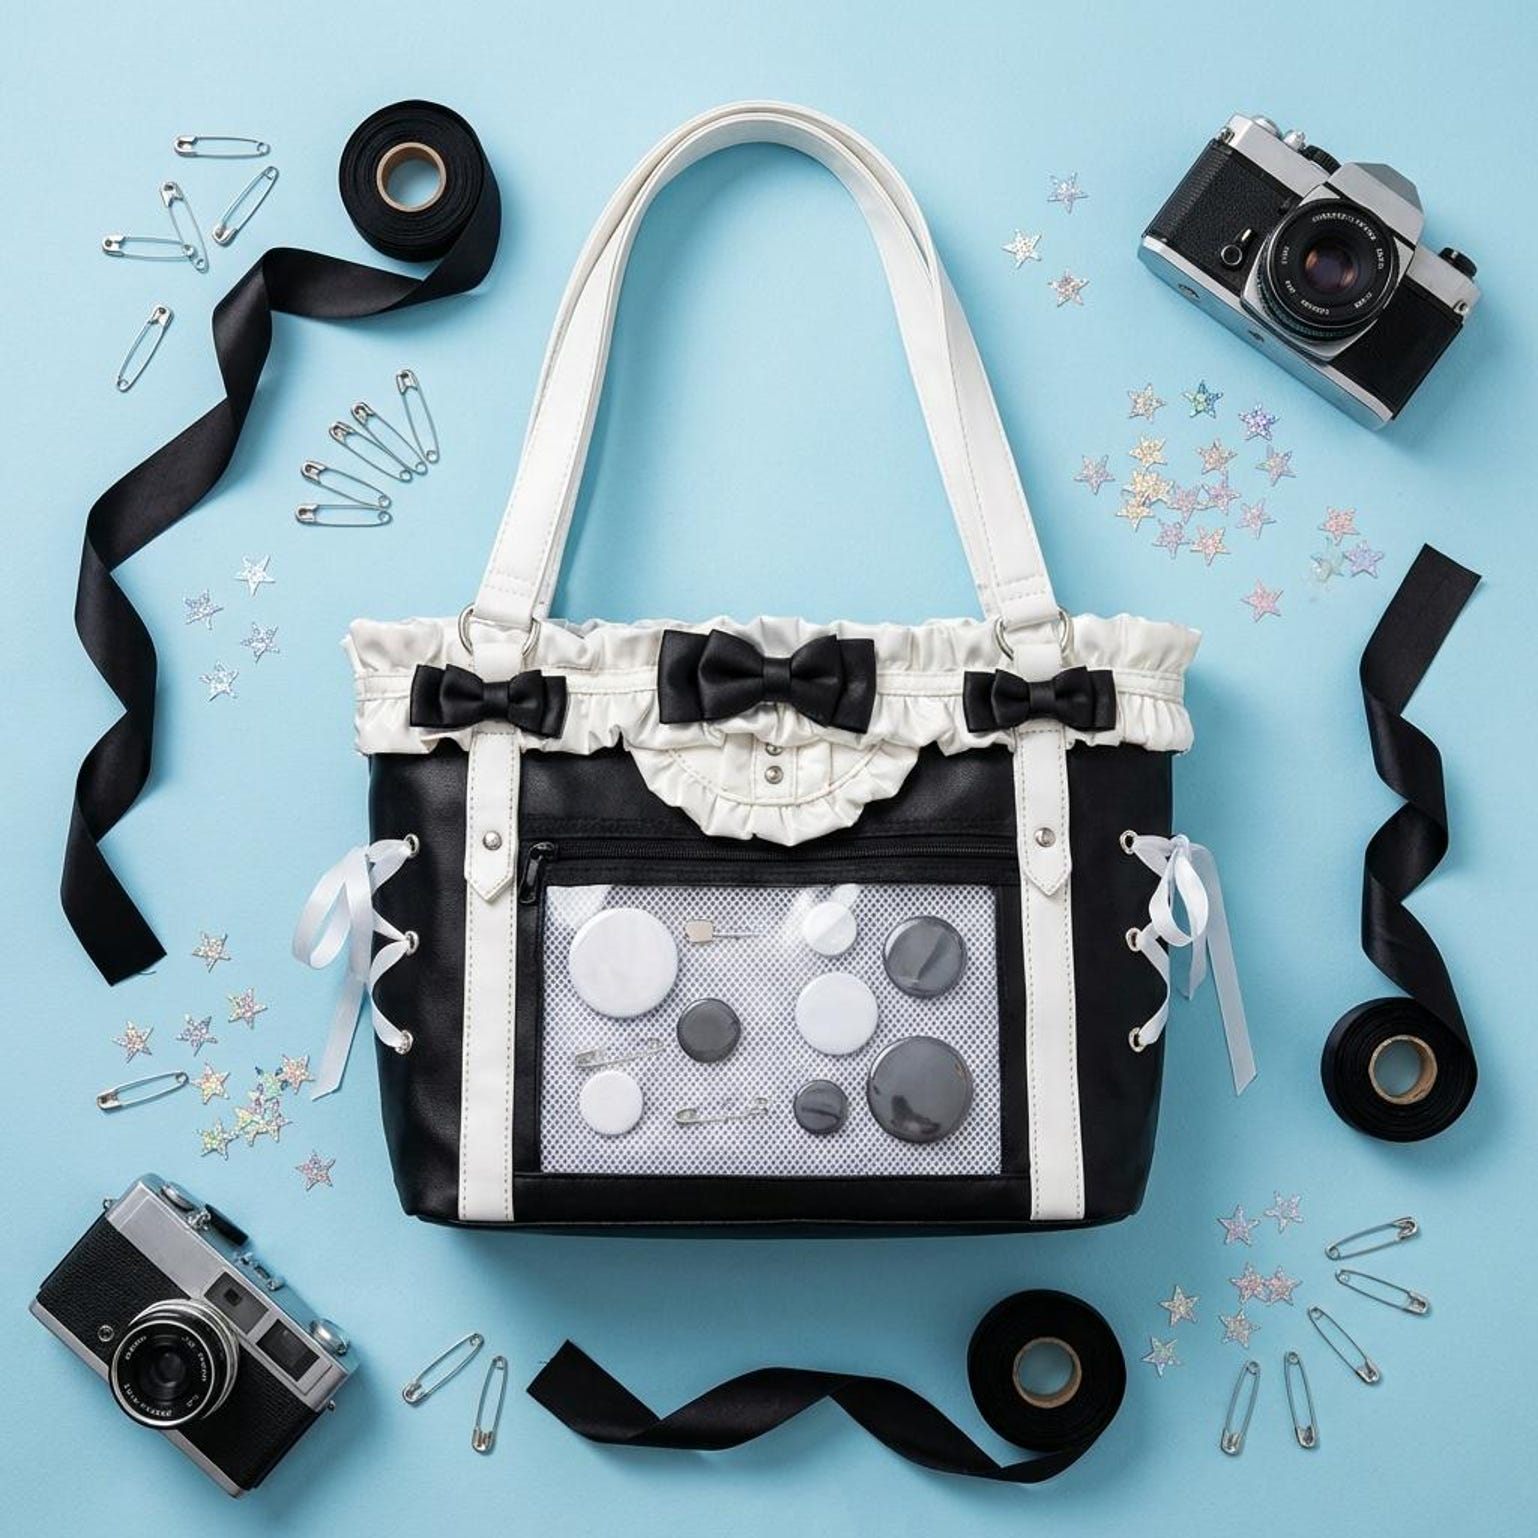
By the mid-2010s, Japanese brands like Wego and Swimmer began producing purpose-built ita bags: bags designed from the start with a display window and a removable insert. The category became a recognizable product type with its own design language — typically heart or star windows, kawaii color palettes, and padded inserts specifically sized for enamel pins.

Global spread followed the growth of anime fandom outside Japan. Western fans encountered ita bags at anime conventions, through social media, and via international shipping from Japanese retailers. By the late 2010s, ita bags had a robust international community, with English-language subreddits, TikTok accounts, and dedicated stores serving buyers in the US, Europe, and beyond.

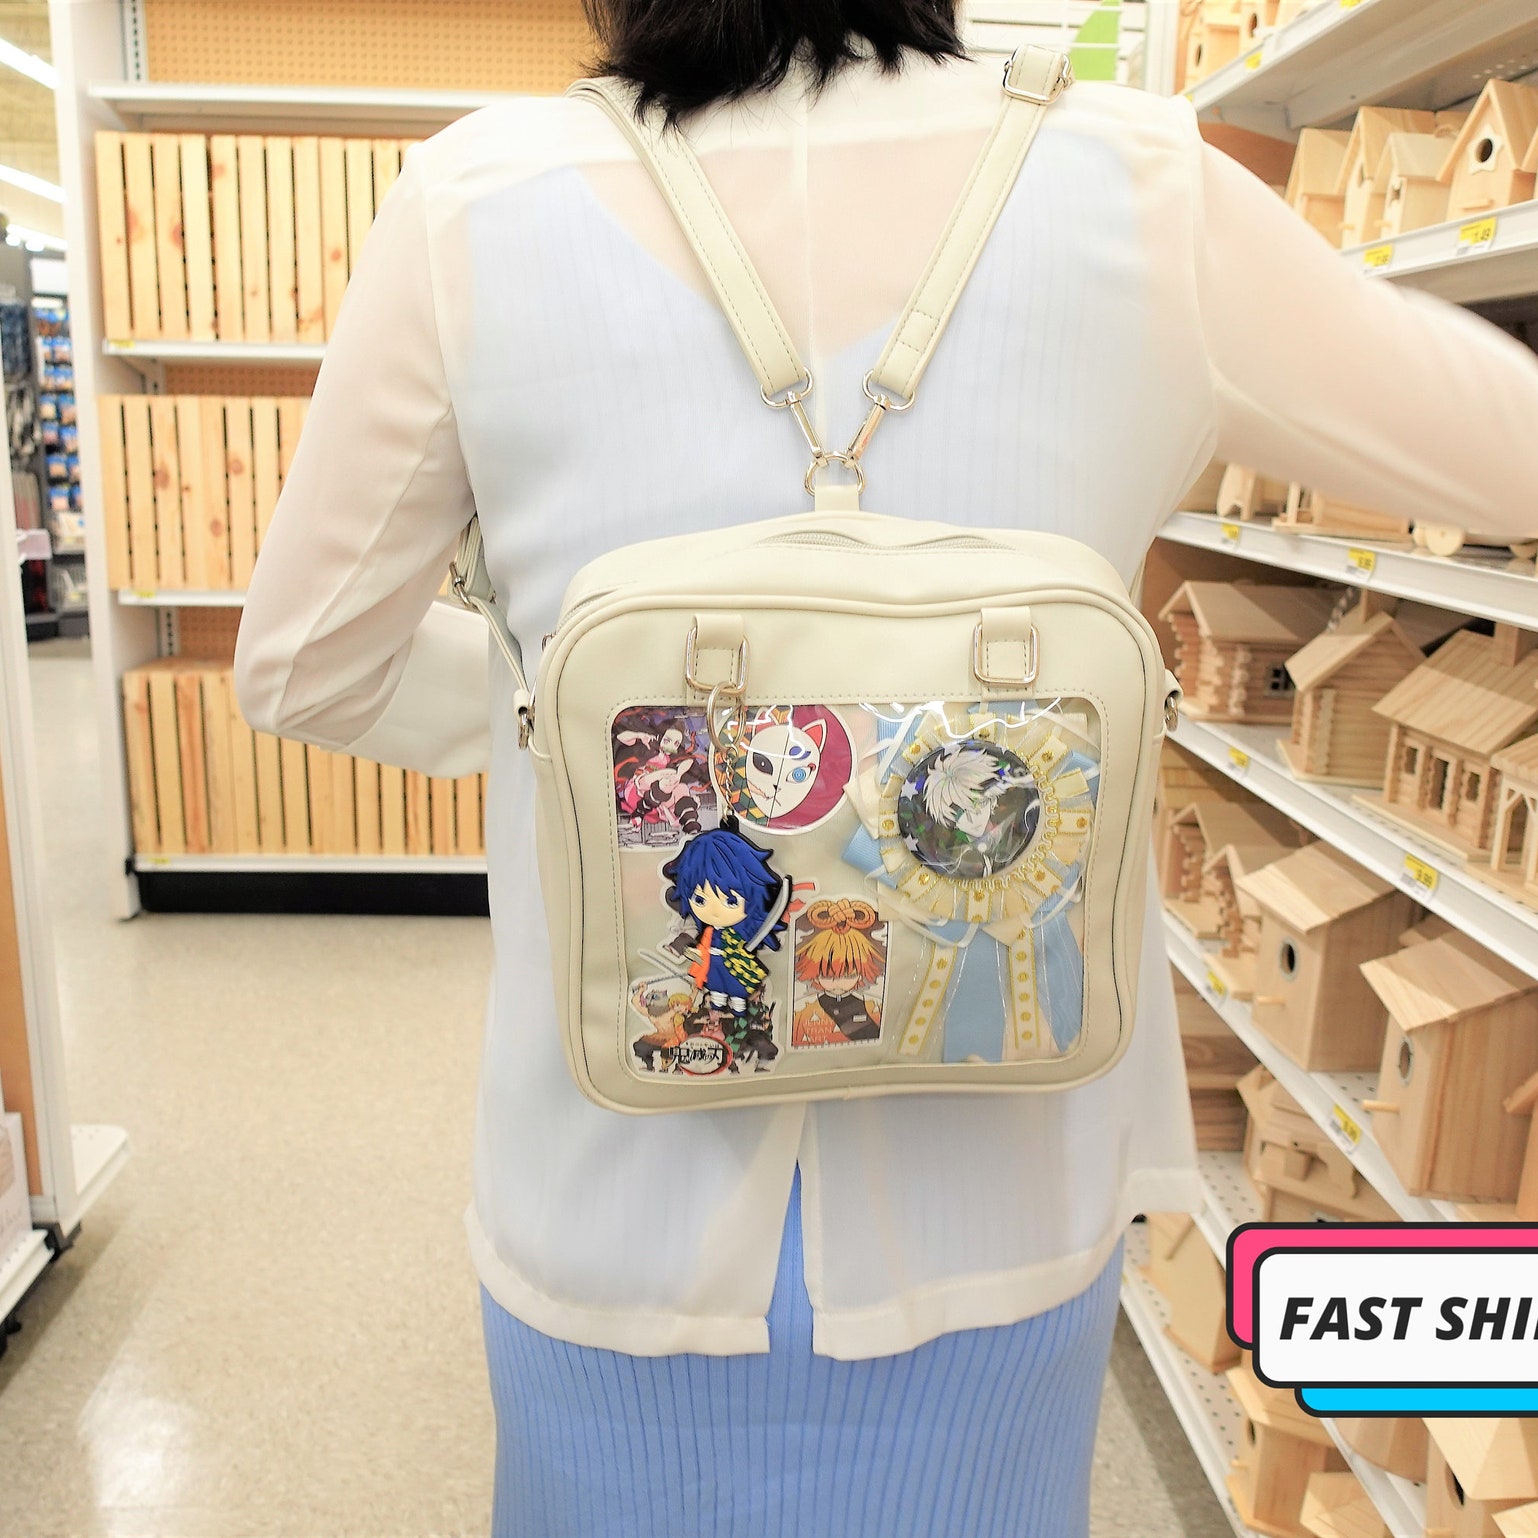
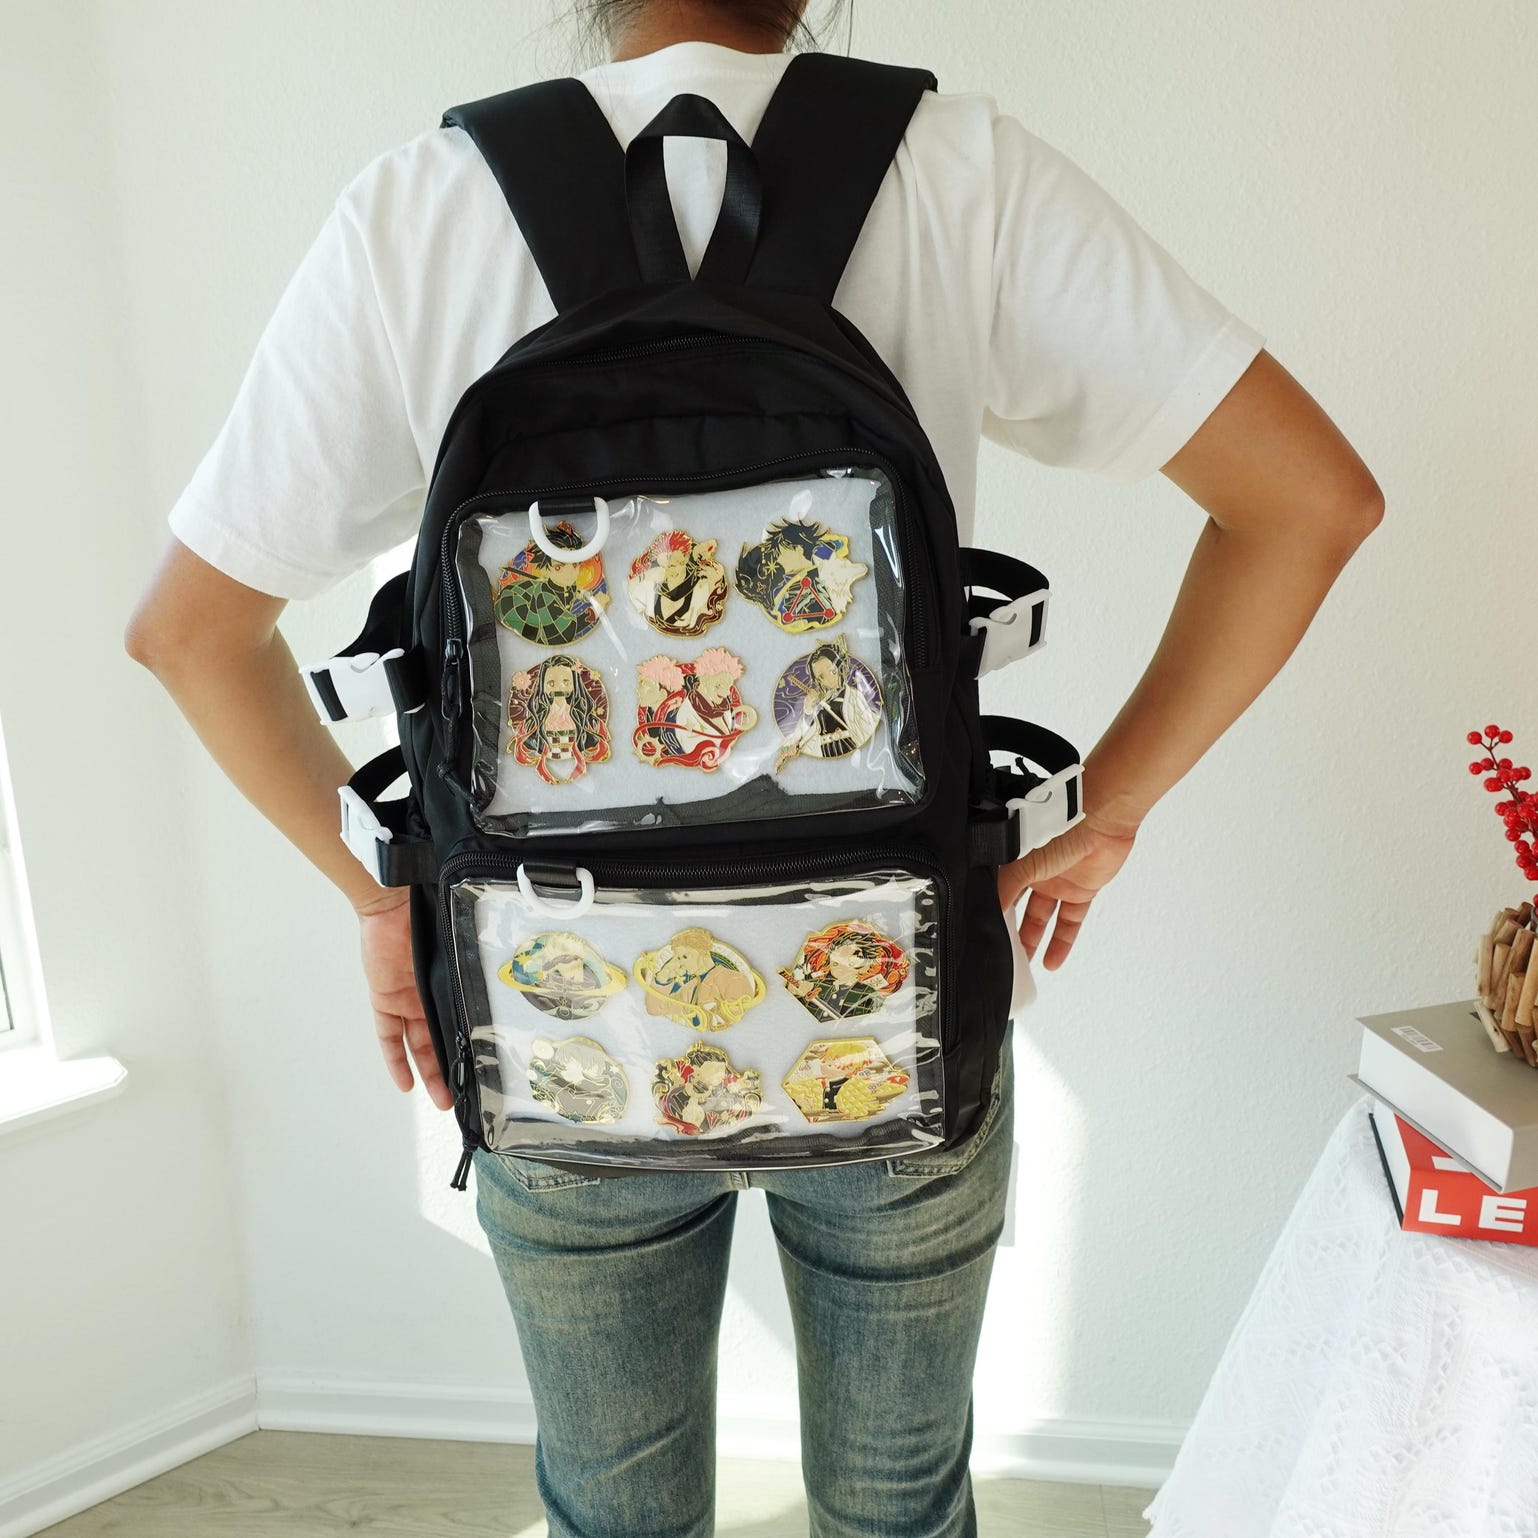
Today the category spans a wide range of formats — messenger bags, backpacks, crossbody bags, shoulder bags, and wallet-style mini bags — and is used by collectors across anime, K-pop, gaming, and general kawaii aesthetics. The display window and removable insert remain the consistent through-line across all of them.

The Main Formats on the Store

Ita bags come in several distinct carry formats. Each has a different balance between display area, carry capacity, and daily usability. The right format depends on your merch type and how you plan to use the bag.

FormatBest forWhy
Messenger and crossbodyPins, badges, lighter daily carryEasy entry point and easier to style without backpack bulk. Good first bag for most collectors.
Convertible bagsBuyers who want flexible carry optionsUseful when one bag needs to work as both a shoulder bag and a backpack. Many include two inserts.
BackpacksSchool, conventions, bigger displaysBetter capacity and better balance once the bag gets heavier with a full pin display and daily carry items.
Shoulder bagsMid-size collections, casual daily carrySits naturally at the side, shows the window clearly without requiring backpack positioning.
Plushie-friendly shapesDolls, plush focal points, larger figuresWins on depth and interior volume rather than raw pin count. Window depth matters for 3D display items.
Mini bags and walletsSmall collections, secondary display bag, eventsGood for a focused single-character shrine or as a complement to a larger main bag at conventions.

To go narrower by format, use the main ita bags archive, the backpack archive, or the full shop.

Ita Bag Inserts: What They Are and Why They Matter

The insert is the backing board that sits behind the clear window panel. It is the surface you actually pin things to, arrange acrylic stands on, or attach charms to. Without an insert, pins would either go through the bag’s interior fabric (damaging it) or would need to be stuck through foam taped inside the window — neither of which works well long-term.

Most inserts are made from one of three materials:

  • Fabric-wrapped foam board — the most common type. Pins push in easily, hold firmly, and can be repositioned without leaving visible holes. Good balance of grip and flexibility.
  • Plastic canvas — a rigid grid material used in cross-stitch crafts. Pins go through the grid holes, which means positioning is constrained to the grid spacing but the insert is very durable and easy to clean.
  • Cardboard or craft foam — used in DIY inserts and the cheapest commercial bags. Functional but degrades faster and does not grip pins as securely.

Insert sizing matters as much as material. An insert that is too small for the window will not fill the frame and will look incomplete. An insert that is too large will not fit properly and may bow or wrinkle. When buying an ita bag, check whether the bag includes an insert — many mid-range and above bags do. If not, measure the window dimensions carefully before buying a separate insert.

Some bags — particularly larger convertible formats — include two inserts, which lets you set up two separate displays or rotate between themes without re-pinning everything each time.

See the ita bag inserts archive for compatible insert options across different window sizes.

Choosing an Ita Bag by Merch Type

The merch you plan to display should determine the bag format before anything else — before color, before price, before aesthetic. Different merch types have genuinely different requirements from the bag.

Enamel pins and button badges. The most common ita bag use case. Pins work in almost any flat insert format and look excellent in bags with a wide, shallow window. For a primarily pin-based display, a messenger, crossbody, or shoulder bag usually gives the best visual result — the window sits flat and pins read clearly without any 3D depth requirements. Ita bags with two inserts are useful if you want to separate fandoms or switch themes frequently.

Acrylic stands. Acrylic stands are flat but need to lean slightly to remain visible through the window. They work best in bags where the insert has some depth behind it so the stands can angle slightly without falling. A convertible or backpack format typically handles stands better than a very flat messenger. Look for bags where the insert has some support behind it — either a rigid insert board or a pocket that holds the insert in an angled position.

Photocards and trading cards. Photocards are flat, and many collectors sleeve them before displaying. They work with any insert type but show up best when the window is very clear and unscratched. K-pop fans often arrange photocards in a grid or by era, sometimes mixed with official light-stick keychains and button badges. A medium messenger or crossbody bag is the most popular format for idol-focused displays.

Plushies and small dolls. Plushies need depth — the window needs to be large enough to frame them and the interior needs enough space so the plushie sits naturally rather than being compressed flat. Look specifically for bags described as plushie-friendly or with large clear windows that accommodate 3D items. Standard messenger bag windows are usually too shallow for anything larger than a palm-sized plushie.

Rosettes and large charms. Rosettes are layered fabric decorations that are popular as ita bag centerpieces, especially in K-pop and idol fandoms. They are bulkier than pins and need a well-spaced arrangement to look intentional rather than cluttered. Mix them with flat pins in a balanced layout — one or two rosettes as focal points surrounded by complementary pins.

How to Choose the Right First Ita Bag

A first ita bag should solve a use case clearly before it tries to win on aesthetics alone. The most common mistake is choosing by visual appeal first — a bag that looks beautiful in product photos but turns out to have a window too small for the merch you own, or a format that is awkward to carry for more than an hour.

Use this sequence for your first decision:

  • Start with merch type. Are you primarily a pin collector, a plushie fan, a photocard collector, or a mix? This determines whether you need a flat messenger style or a deeper bag with more window volume.
  • Decide on carry style. Will you wear the bag for hours at a convention? Daily to school or work? Occasionally for events? Longer carry times favor backpacks for weight distribution. Casual daily carry suits crossbody or shoulder bags better.
  • Check the window dimensions, not just the bag dimensions. Listing photos always show the bag at its most appealing. The window dimension spec tells you how much actual display space you have.
  • Confirm whether the insert is included. Bags that come with an insert save you a separate purchase and guarantee compatibility.
  • Consider starting smaller. For a first bag, a mid-size messenger or crossbody is lower-risk than a large backpack. You learn how to set up a display, how to manage the insert, and whether you like the format — before investing more in a larger bag.

If the bag has to work for school or daily commuting, comfort matters as much as display space. Padded shoulder straps are worth paying attention to, especially for bags you will carry while walking for long periods.

Ita Bag Size Guide

Ita bag sizing involves two distinct measurements: the overall bag dimensions and the window dimensions. Both matter, but for different reasons.

Overall bag dimensions tell you how much carry space you have and whether the bag is appropriately sized for its intended use. A small crossbody with a 10cm × 15cm body is not going to hold much beyond essentials. A large backpack with a 30cm × 40cm body can handle convention gear, a laptop, and a substantial merch display simultaneously.

Window dimensions tell you the actual usable display area. This is the number that directly affects how many pins fit, whether your acrylic stands will work, and whether your plushie can sit in the window without being cropped. Always look for window dimensions specifically — not just overall bag size.

Window size rangeDisplay capacityGood for
Under 15cm × 20cm8–15 standard pinsMini bags, wallet ita bags, small crossbody formats
15cm × 20cm to 20cm × 25cm15–30 pins or a few acrylic standsStandard messenger, crossbody, shoulder bags
20cm × 25cm to 25cm × 35cm30–60 pins or a larger stand displayMid-size convertibles, larger messengers
Over 25cm × 35cm60+ pins or plushie-scale displayLarge backpacks, plushie-format convertibles

These are approximate ranges — actual capacity depends on pin size, arrangement density, and whether you are mixing pin types with stands or charms. Use them as a starting estimate, then verify against the specific listing’s window measurement.

Note that listings from Japanese brands often give measurements in centimeters. 1 inch = 2.54 cm. A 10-inch bag window is approximately 25.4 cm.

Why Inserts and Sizing Matter More Than You Think

Most first-time buyers focus on how the bag looks from the outside. The inserts and sizing questions feel secondary — technical details that can be sorted out later. In practice, they are what determines whether the bag actually works for your collection.

A bag without a good insert will either require you to pin things directly through the bag fabric (which damages it over time and makes repositioning difficult) or use ad-hoc solutions that do not hold the display in place. A bag whose window is sized wrong for your insert will have visible gaps or bunched fabric around the edges. Both situations look bad and make the daily experience of using the bag frustrating.

The good news: once you know the window dimensions, insert compatibility is straightforward. Most bags either include an insert or have a clear measurement that you can match against universal insert sizes. Checking these details before purchase takes two minutes and eliminates most buyer regret.

If inserts are the specific blocker — you have a bag and need the right insert — go directly to the inserts archive. If sizing is the question, the size table above covers standard ranges. If you are still in the browsing phase, open the main archive and filter by carry format first.

Four beginner-friendly live picks

These current products show the real spread on the store: simple messenger, flexible convertible, larger backpack, and an insert-ready display option.

Black Kawaii Ita Messenger Bag with Clear Window for Pin Display

Black Kawaii Ita Messenger Bag with Clear Window for Pin Display

Clear Window Ita BagsIta Bags For Pins

Combines everyday carry with a clear display area for pins, badges, charms, or character merch.

  • Works for visible display of pins, badges, charms, photocards, or small merch when the listing notes a clear…
  • Next step: Choose the color or style that fits your display setup, then match it with the pins, badges…

$54.65

In stock
View product
Convertible Ita Bag with Clear Window for Pin Display

Convertible Ita Bag with Clear Window for Pin Display

Clear Window Ita BagsConvertible Ita Bags

Combines everyday carry with a clear display area for pins, badges, charms, or character merch.

  • This option includes two inserts
  • Designed with an insert and an interior pocket, this ita bag offers three carrying styles – backpack, shoulder…

$33.33

In stock
View product
Kawaii Ita Backpack for Pin Display

Kawaii Ita Backpack for Pin Display

Ita Bag BackpacksIta Bags For Pins

Combines everyday carry with a clear display area for pins, badges, charms, or character merch.

  • Designed to hold 2 inserts at the same time
  • Works for visible display of pins, badges, charms, photocards, or small merch when the listing notes a clear…

$39.99

In stock
View product
Large Convertible Ita Bag with Clear Window and Included Insert for Plushies and Pins

Large Convertible Ita Bag with Clear Window and Included Insert for Plushies and Pins

Clear Window Ita BagsConvertible Ita Bags

Designed to display plushies, dolls, pins, and badges while keeping everyday essentials organized.

  • Dimensions of the side window: Height: 20 cm, Width: 9 cm.
  • Handmade. The transparent window on the side can hold dolls.

$94.44

In stock
View product

Setting Up Your First Ita Bag Display

Setting up an ita bag display for the first time is easier than it looks from the outside. The main steps:

  1. Remove the insert from the bag. Most bags have the insert sitting in a pocket behind the window or attached with velcro. Take it out and lay it flat.
  2. Plan your layout before pinning. Place your pins, stands, and charms on the insert without pushing them in. Move them around until the arrangement feels right. This saves time and avoids holes in the wrong places.
  3. Start from the center. Your most important piece — the focal character, the biggest acrylic stand, or the centerpiece rosette — should go in the center of the insert. Build outward from there.
  4. Use complementary clusters. Group related pins together and use transitions — smaller pins or charms — between clusters to create visual flow.
  5. Check the frame. Hold the insert up to the window before fully inserting it to see how the display reads from the outside. The window edge will crop anything too close to the border.
  6. Insert and close. Slide the insert back into its pocket and close the window panel. The display should be centered and the window clear of creases or bunching.

Most collectors update their display seasonally or for specific events — swapping out pins for a convention theme, adding new merch as it arrives, or building a dedicated display for a new fandom. The insert system is designed for this: pins come out and go back in cleanly with minimal effort.

For a full step-by-step setup guide, see the how to set up an ita bag guide.

FAQ

What is an ita bag?

An ita bag is a display bag with a clear window panel on the front and a removable insert inside. The insert holds pins, acrylic stands, charms, photocards, and other fandom merch in a visible arrangement. It is both a functional carry bag and a portable display for a collection.

What is the point of an ita bag?

To display fandom merch visibly while keeping the setup more organized and more protected than a normal bag. The window protects pins and stands from weather and snags; the insert keeps everything positioned so the display does not rattle or shift.

Are ita bags only for anime fans?

No. The same format works for anime, K-pop, gaming, Disney pins, original characters, and any other merch-collecting hobby. The bag does not care what is displayed in it — the format is fandom-neutral.

What is the best first ita bag?

For most beginners, a messenger, crossbody, or moderate-size convertible bag is the easiest starting point. It is lower cost, simpler to set up, and easier to carry for extended periods than a large backpack. Move to a backpack or larger format once you know you need the extra space.

How many pins fit in an ita bag?

It depends on the window size and pin size. A standard messenger with a medium window (around 20cm × 25cm) typically holds 20–35 standard enamel pins. Larger backpack windows can hold 60 or more. Check the window dimensions on the specific listing for the most accurate estimate.

Do ita bags come with inserts?

Many mid-range and above bags include at least one insert. Always check the listing description — bags that include an insert save you a separate purchase and guarantee sizing compatibility. Some convertible bags include two inserts.

Can I use an ita bag as an everyday bag?

Yes. Many people carry ita bags daily — to school, work, errands, and events. The main compartment holds standard everyday essentials: wallet, phone, keys, and depending on the bag size, a water bottle or small laptop. The display window is on the outside and does not affect interior storage.

What is an ita bag insert made of?

Most inserts are fabric-wrapped foam board. Some are made from plastic canvas (a rigid grid material used in cross-stitch). The foam board version is more common and lets you position pins freely anywhere on the surface. Plastic canvas constrains pin placement to grid intersections but is more durable over time.

Start with the right archive

Once the basics are clear, the next move should be a live category archive. Find your carry format, check the window specs, and confirm the insert situation before checkout.